Saturday, July 9, 2022

Curly Ribbon With Gwen Designs Studios


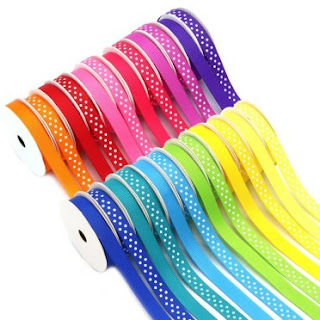
I love having these ribbons handy in my craft room. 
They are such a lifesaver when adding to a project, party decor, ballons, gift bags, and packaging. 

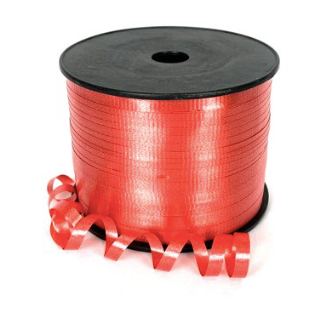
On this occasion, I decided to use the curly ribbon to make an easy and fast DIY 4th Of July project. 


I hung my project in my craft room as a celebration of the holiday. 

All you need is: 

Gwen Studios Curly Ribbon - Red, White & Blue

Metal Decoration hanger

and Scissors.


That is all!!! 

You will take you less than 30 minutes. So all you have to do is cut up your ribbon at your desired length, remember to leave it longer when curling as it will become a lot shorter. 
You then get 4 or 5 strands of curly ribbon and make a knot to attach them to the metal wire like I did below: 


You add the blue curly ribbon next and you are all DONE! 

Of course, you can add as many ribbons as you like. I kept mine very basic.


You can find all the curly ribbons at your local Walmart and online at Walmart.com

There is a range of popular colors plus holographic and metallic colors to choose from.


  Everything looks better with a quick'n EZ touch of curly ribbon!

Find more inspiration using curly ribbon from Gwen Studios on the 


Thank you so much for stopping by!

Till next time....... Craft On! 💗
Rosie

Tuesday, May 31, 2022

Summer Fun With Gwen Studios


Hello! 
Can you believe it is Summer already! 
The year just keeps flying by and we have to enjoy it before it is gone right? 
I know I am! It is honestly my favorite season of the year. 
It is also vacation time for us and our perfect vacation always has to have a beach. 
So you know making summer beach projects had to be fun for me. 
They will also be the perfect gift for someone I know.

Let's get started!

Gwen Studio products: 
(You can find these ribbons at Michaels.com)


You will also need: 

Adhesive
Burlap Trim
Scissors
A wire circle (or foam)
Fishstars/Seashell 
White cording
Small canvas bag
Flipflops 


To make the lifesaver or wreath:
    * Use burlap trim and go around wire circle.
    * Add adhesive at the end of burlap trim. (I used clips to hold till dry.)
    * Add ribbon in the four corners.
    * Decorate with fish stars.
You can see the finished project below.


This super cute canvas bag I plan to use as a gift cardholder. All I did was adhere ribbon around the handles to make it match other projects. The presentation is everything and I know the person receiving them will love them.
See pic below.


I found these flip flops at local Dollar Tree and I thought they would make a great gift, besides they matched my whole red and white stripe theme, and adding a bow just made them cuter!
See pic below.


Are you ready to see the finished projects? 


Here is my finished lifesaver decor:
Small canvas gift card holder: 
(I also added a few more starfish to decorate.)

And the super cute flip flops:


So all three projects will make a fun and easy gift for someone. 


What do you think? Nice and easy right? My kind of projects. :)

Find more inspiration using the red & white stripe ribbon from Gwen Studios on the 


Thank you so much for stopping by!

Till next time....... Craft On! 💗
Rosie


Tuesday, March 15, 2022

Easter Project With GwenStudios Ribbon


Hello! 
I am so ready for Spring and its weather and for sure its colors! 
Today I made this cute and simple basket using the fabulous ribbon from Gwen Studios and I'm so in love with the favorite pack of pastel colors which you can find at Walmart.com by the way.

You can also find links down below. 


I used:
Any type of can, container to alter ( I used this one from Ikea) 
Fabri Tac Adhesive
Scissors
Your favorite embellishments


This project was so fast and easy that it took me only about an hour to finish. 
It is very self-explanatory but I've made a short video for you to watch and get ideas.


I really hope to inspire you for some easy Easter projects.

Here are some pics of my final project!


Thanks for stopping by!

Till next time....... Craft On! 💗
Rosie


Please visit the Designer Connection Crafts for more Gwen Studios Ribbon ideas!


Tuesday, February 15, 2022

DIY Easy St. Patrick's Day Shamrocks With Ribbon


The year is flying and can you believe St Patrick's Day is almost here! 

It is that time again to play with my favorite ribbon from Gwen Studios! It is always so much fun to use ribbon in about every project. 

To celebrate St Patrick's Day I decided to make this cute display and add the clover leaves made out of ribbon. I made two different styles as you can see below. 


The material I used are:

I only used the greens from this pack which you can find at Walmart online.


I also used different sizes of satin esmerald green ribbon to make the cloverleaf. You can also find them at Walmart online.


I also used: 


Fabri-Tac Adhesive
Lighter
A thread and needle
Scissors
and straw sticks
So let's get started! 

Cut a piece of ribbon measuring 3.5". 
You can burn the ends to avoid unraveling. 
Do a straight stitch.

Leave extra thread on both ends to bring together and make a knot.

You can burn the edges to give it a little more shape but it is not necessary.

Add your straw stick in the middle.

Cut a small piece of ribbon and attach your three pieces 

Once you have attached the three leaves, 
turn over and add a square piece of ribbon to hold it all in place.

And you are done! 
You can add a center for a little more decoration.

For the next style of shamrock leaves, you can see in the picture below how easy it is.

You cut (2) pieces of 3.5" of ribbon.
You can use the same color or different.
You criss-cross as shown in the picture and adhere down with Fabri-Tac glue.

Make three of them for a shamrock.

Cut to small square pieces to put in front and back 
Then attach together.

You are done! So fast and easy right? 

and your Shamrocks are ready for display.


Please visit the Designers Craft Connection for more Gwen Studios Ribbon ideas!


Till next time....... Craft On! 💗

Rosie

Monday, January 10, 2022

Romancing the Ribbon - TShirt With Ribbon Roses


 Happy 2022!!!

I love starting the year doing what I love, especially if the outcome is this. 
The perfect gift for a little girl. 😍

Like most of my projects I want it to make it easy but at the same time pretty and meaningful. 

Let me tell you the flowers were the easiest to make. (Pls see link to video below) Just make sure you are using the right ribbon and Gwen Studios has the perfect ones to work with.


Here is a close up of the beautiful flowers I created with the ribbon.

Aren't they pretty?

Let's Get Started

I used a toddlers size T2 white Tshirt. 

I used about 10" of each color ribbon. You can add as many flowers as you wish. 
I only used two white, two pink and one red.

I used Fabric Adhesive that is waterproof to adhere flowers down.

Once I followed the easy YT video tutorial to make flowers with Gwen Studios ribbon I lined them up in a straight line and adhere them down.


My perfect little model! 

This project must have taken me less than an hour to complete. 
So I hope you try this!

You can find all the ribbons at Walmart online:


Shirt

 Fabri Tac Adhesive

Yarn Needle

To make ribbon flowers I followed this tutorial:

Amazing Ribbon Flower Work - Hand Embroidery Flowers Design - Sewing Hacks - DIY Easy Flower Making by YT:  Merry Craft


Till next time....... Craft On! 💗

Rosie


For more Romancing the Ribbon design ideas,